Linking Customers to Itineraries
Learn how to connect customers from your database to itineraries, ensuring proper tracking and communication for each trip.
Overview
Linking customers to an itinerary helps you:
- Track which clients are traveling
- Associate trip details with the right customer profiles
- Designate points of contact for communication
- Maintain organized records of customer bookings
Note: An itinerary can exist without any customers linked to it. However, if you link customers to an itinerary, at least one of them must be designated as a Point of Contact.
Adding Customers to an Itinerary
Step 1: Open Customer Linking
While creating or editing an itinerary, click the Customer button to link customers.
Step 2: Search for Customers
Use the search bar to find customers from your database. You can search by:
- First Name
- Last Name
- Email Address
- Phone Number
Simply start typing, and matching customers will appear in the results.
Step 3: Add Customers
- Click on a customer from the search results to add them to the itinerary
- Add as many customers as needed for the trip
- You can add multiple travelers for group bookings or family trips
Step 4: Save
Once you've added all customers, click Save to link them to the itinerary.
Point of Contact
What is a Point of Contact?
The Point of Contact (POC) is the primary person you'll communicate with regarding the itinerary. This is typically:
- The person who made the booking
- The trip organizer
- The main decision-maker for the group
Default Point of Contact
When you add customers to an itinerary:
- The first customer in the list is automatically marked as the Point of Contact
- This designation is shown with a badge or indicator
Multiple Points of Contact
You can designate more than one Point of Contact for an itinerary. This is useful when:
- A couple is traveling together and both should receive updates
- Multiple decision-makers need to approve changes
- You need to communicate with several group leaders
Requirements
- If customers are linked to an itinerary, at least one Point of Contact is required
- You cannot have linked customers without designating at least one POC
- An itinerary can exist without any customers linked to it
Changing Point of Contact
To change who is marked as a Point of Contact:
- View the customers table in your itinerary
- Toggle the checkbox next to the customer you want to designate as POC
- The changes are saved automatically
Adding New Customers on the Fly
If a customer doesn't exist in your database yet:
- Click Add New Customer from the customer linking interface
- Enter their basic information (at minimum, first name)
- They'll be added to your customer database and linked to the itinerary
- You can send them a profile update form later to collect complete details
Managing Linked Customers
Viewing Linked Customers
All customers linked to an itinerary are displayed in the customer section of the itinerary details.
Removing a Customer
You can remove a customer from an itinerary using either method:
Method 1: From the Customers Table
- Click the three-dot menu (⋯) on the customer row
- Click the Delete button
- Confirm the removal
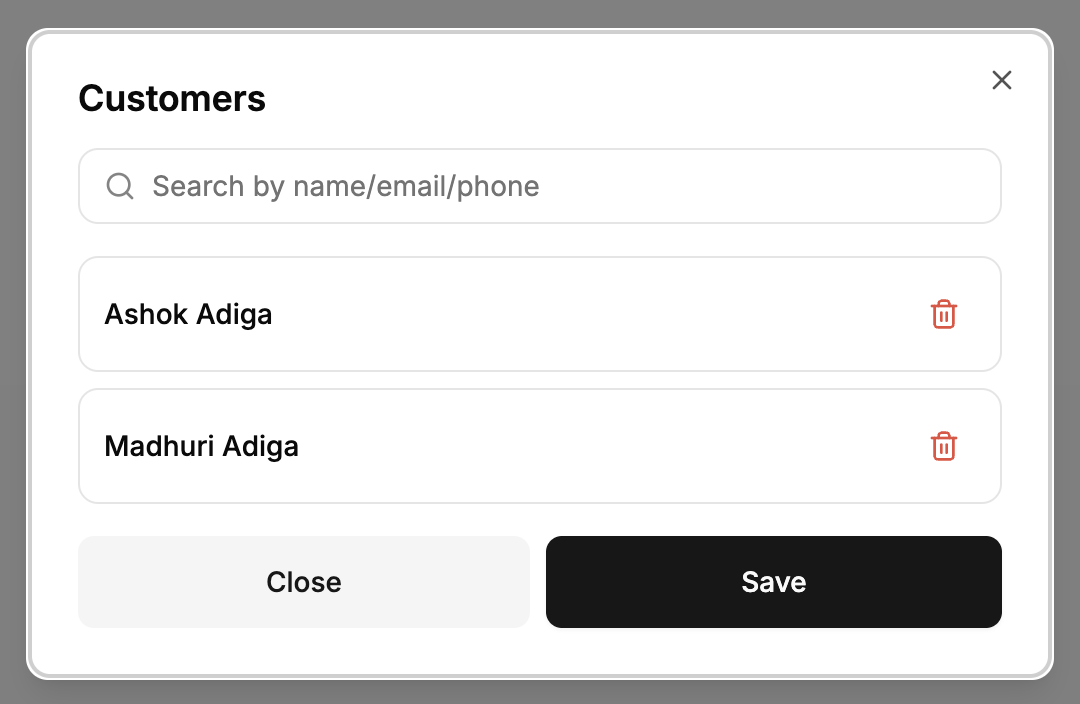
Method 2: From the Add Customer Modal
- Click the Customer button to open the linking interface
- In the modal, you'll see all customers currently linked to the itinerary
- Click the delete icon next to the customer you want to remove
- Click Save
Note: If you have customers linked to the itinerary, you must maintain at least one Point of Contact. If you try to remove the only POC, you'll need to designate another customer as POC first, or remove all customers from the itinerary.
Editing Customer Details
If you need to update a customer's information while working on an itinerary:
- Click on the customer's name
- Select Edit Customer
- Update the necessary information
- Save changes
Important: When you edit a customer from an itinerary, you're editing the actual customer record in your customer database. The updates will reflect across all itineraries linked to that customer.
Best Practices
During Booking
- Add all travelers who will be on the trip, not just the person who made the booking
- Designate the right POC - choose the person who will be your primary contact
- Verify customer details before linking to ensure you're selecting the correct person
For Group Travel
- Add all group members to keep complete traveler records
- Consider marking multiple POCs for larger groups
- Use the notes field in customer profiles to indicate group relationships
Communication Planning
- Ensure your Point of Contact has a valid email and phone number
- Mark all travelers who should receive itinerary copies as POCs
- Update POC designation if the primary contact changes
Common Questions
Can I link the same customer to multiple itineraries? Yes, customers can be linked to as many itineraries as needed. This is common for repeat clients.
What happens if I delete a customer who's linked to itineraries? Deleting a customer will remove them from all linked itineraries. Consider marking them as Inactive instead to preserve booking history.
Can I change the Point of Contact after creating the itinerary? Yes, you can change POC designation at any time by editing the customer links.
What if I accidentally add the wrong customer? Simply remove them using either the three-dot menu or the add customer modal, then add the correct customer instead.